
Integrate your Extreme Networks devices with your MyWiFi account and enable guest access capabilities.
Required:
- Active MyWiFi subscription
- Active Aruba Networks subscription
- Active location with an assigned campaign
Extreme Networks - access point identification
- Log in to the Extreme Networks Cloud.
- Under your dashboard, find and save the Device MAC address for each access point you are going to add to MyWiFi.

MyWiFi Setup
- Log in to your dashboard.
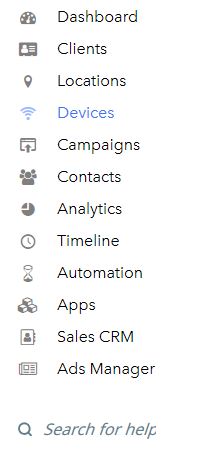
- Select Devices.
- Click Add New Device.

- Select the Location, enter a Device Name, and choose Ubiquiti.

- Enter the MAC address(es) that you retrieved from Extreme Networks above. If you're entering more than one, you can list them all at once, separated by commas.
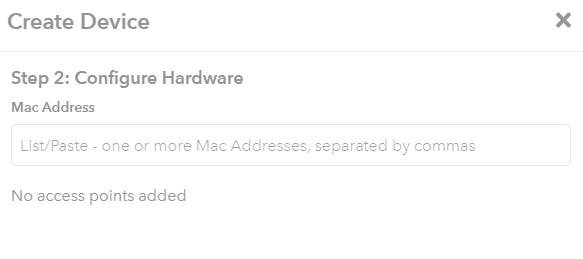
- Click Complete Setup after confirming the device information.
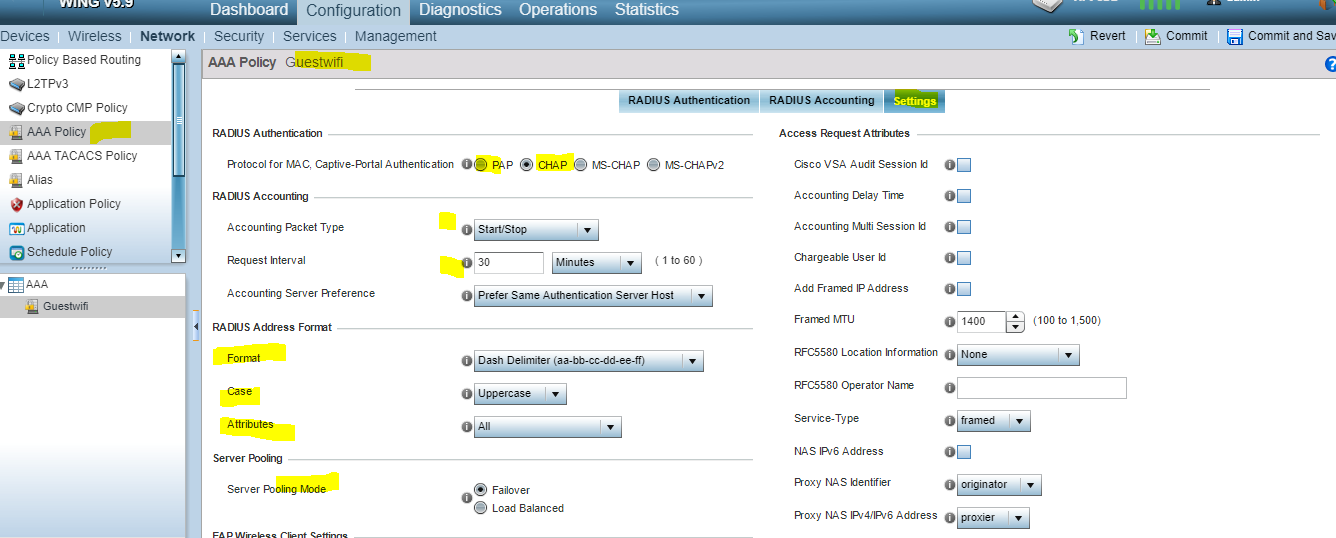
Extreme Networks - configure RADIUS authentication
- Name: MyWiFi
- Type: select AAA Policy Edit
- Auth Method: select PAP
- Backup RADIUS: check Enable Backup RADIUS support
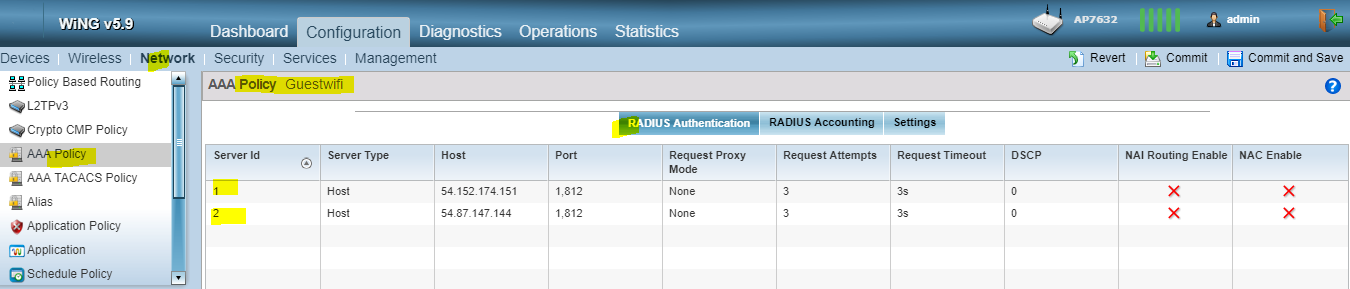
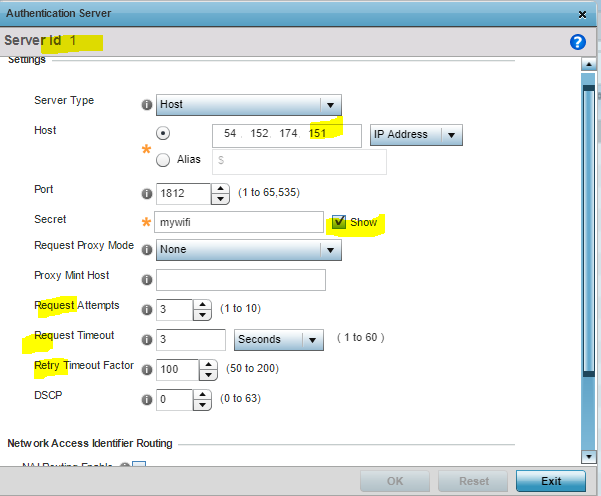
Configure a Primary RADIUS Server with the following parameters:
- IP Address: 35.174.133.59
- Secret: mywifi
- Port: 1812
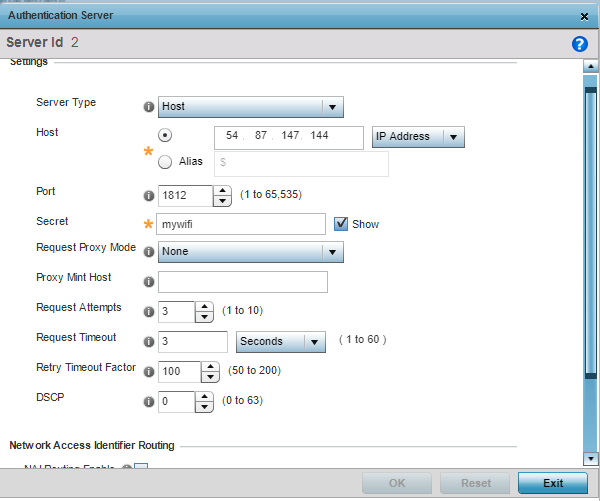
Configure a Secondary RADIUS Server with the following parameters:
- IP Address: 52.4.206.21
- Secret: mywifi
- Port: 1812
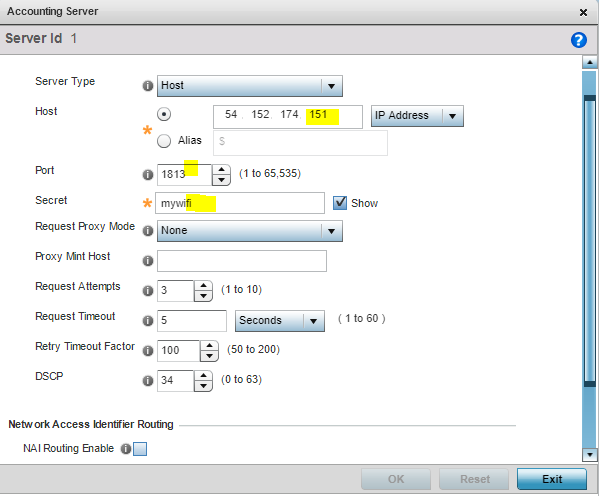
Configure RADIUS Accounting:

- Name: Enter name for Accounting method (ex. MyWiFi RADIUS Accounting)
- Type: select AAA Policy Edit
- Backup RADIUS: check "Enable Backup RADIUS support"

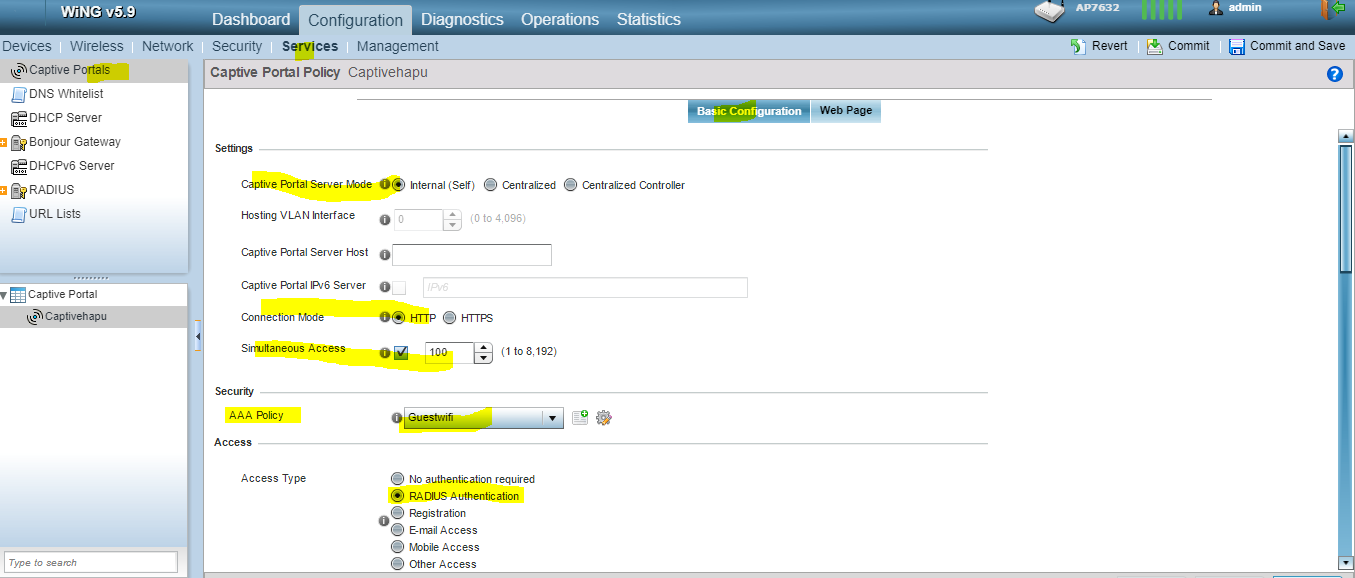
Create a new Captive Portal Profile
- Name: MyWiFi
- Captive Portal Server Mode: [Dependant on your deployment]
- Captive Portal Server Host: Enter your custom social portal URL. If you don't have one, use securewifilogin.com
- Connection Mode: HTTP or HTTPS
- Simultaneous Access: Enter as many clients as you think is necessary
- AAA Policy: Choose your previously-created policy
- Access Type: Radius Authentication
Redirect URLs
- Web Page Source: Captive_Portal_Webpage_External
- Enter Domain: Enter your custom social portal URL. If you don't have one, use securewifilogin.com
User Session
- Session Timeout: leave unchecked
- Grace Period: leave unchecked
Authentication/Accounting Servers
- Authentication Server: select the Server entered as MyWiFi RADIUS Auth
- Enable MAC authentication bypass: unchecked
- Accounting Server: select the Server entered as MyWiFi RADIUS Accounting
- Send Interim-Update: enter every 5 minutes
- Wireless Client Isolation: unchecked
Walled Garden / Domain Whitelist Settings
The DNS whitelist is a list of domains that can be accessed before authentication -- you'll need to set this up to be able to use MyWiFi.
All the domains must be entered individually and in the following format:
Here is the complete list of domains that need to be whitelisted:
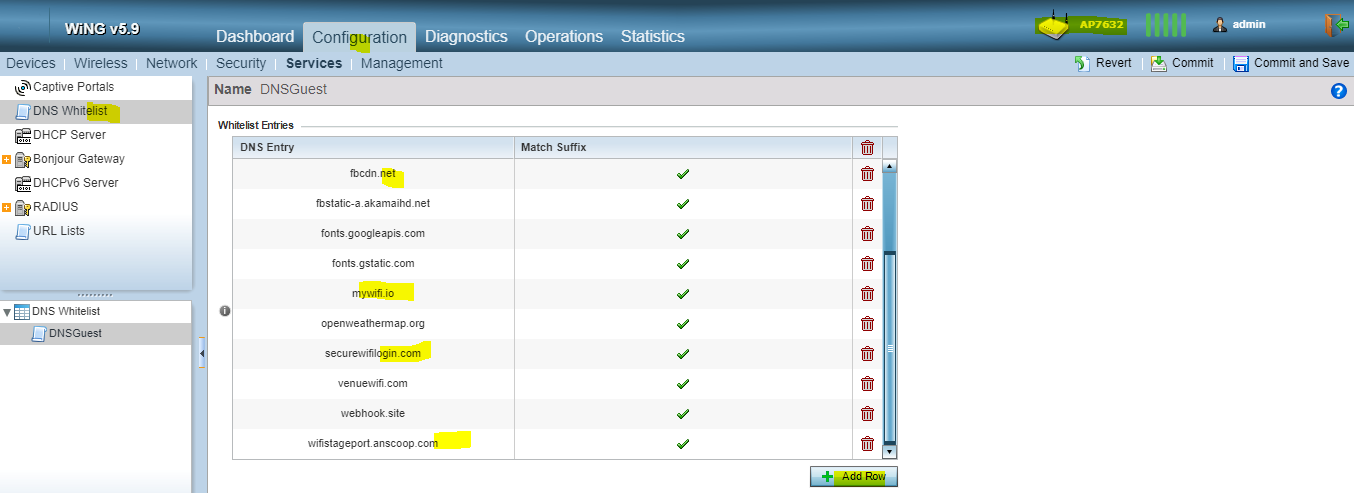
Add Into Your Allowed Hosts/Domains Prior to Authentication List
*.<Custom Social Portal Domain>
*.mywifi.io
*.securewifilogin.com
*.cloudfront.net
fonts.gstatic.com
fonts.googleapis.com
*.linkedin.com
*.amazonaws.com
*.licdn.com
*.twitter.com
*.facebook.com
*.fbcdn.net
*.doubleclick.net
*.fbsbx.com
*.twimg.com
*.instagram.com
*.facebook.net
*.stripe.com
*.paypal.com
*.paypalobjects.com
*.twilio.com
*.vk.com
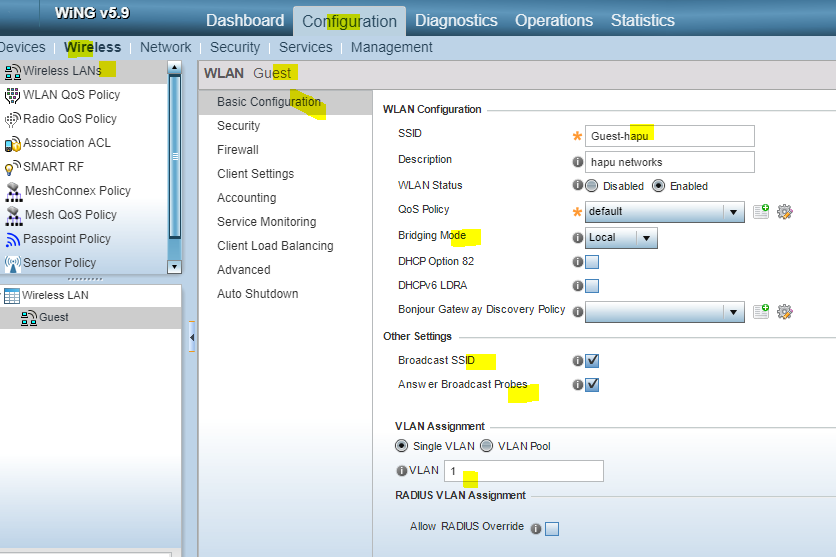
Wireless LAN Settings
- WLAN: Guest
- SSID: enter your desired SSID
- WLAN Status: Enabled
- VLAN: 1 (or your alternate selection)
- Bridging-Mode: local
- Encryption-Type: none
- Broadcast SSID: checked
- WLAN Captive Portal - Enforcement: Captive Portal Enable
- WLAN Captive Portal - Captive Portal Policy: (select previously created Captive Portal Policy)
Access Point Changes: If you make changes to your Access Points, please keep the list of Access Point Mac Addresses in the Edit Device section of your Extreme Networks Devices, up to date as appropriate.
Comments
Please sign in to leave a comment.