Brand your social portal URL
After branding your control panel, your social portal URL should also be branded. This will help to establish and convince business owners that the full login experience is fully white label.
It's Important
New domains can take up to 48 hours for full propagation and for the domain to become available and active, though in most cases only take a few hours. Contact your domain host if it takes more than 48 hours.
Required:
- Active MyWiFi subscription.
- A registered domain from any domain registrar like GoDaddy or NameCheap
If working with pre-existing live social apps
It is recommended that you first create a new social app with the new settings instead of editing your existing apps. If your apps haven't been updated, as soon as you change your social app settings then guests of your existing clients will receive an error when attempting to log in.
Domain overview
Log in to where your domain is currently hosted to create a CNAME record.
Godaddy
- Log in to Godaddy.
- Select Domains.
- Find the domain you wish to use and click Manage.
- Select the DNS Record section.
- Create a CNAME record using these parameters:
Host: social
TTL: 1 hour
Points to: mysocialwifi.securewifilogin.com - Click Save DNS Records.
The two red portions can be changed: change social to whatever you want your subdomain to be, and change mysocialwifi to whatever your MyWiFi subdomain/personalized URL is; you can find this information on the Branding page of your MyWiFi account.
cPanel interface (NameCheap, HostGator, Bluehost, etc.)
- Log in to your cPanel dashboard.
- Select Advanced DNS Zone Editor.
- Select the domain you wish to use.
- Add a record using these parameters:
Name: social.yourdomain.com
TTL: 3600
Record type (select from the drop-down list): CNAME
CNAME: mysocialwifi.securewifilogin.com - Click Add Record when ready.
The two red portions can be changed: change social to whatever you want your subdomain to be, and change mysocialwifi to whatever your MyWiFi subdomain is; you can find this information on the Branding page of your MyWiFi account.
DNS check
To confirm that your new domain is active and available before the addition to your control panel, you can check to confirm that it's propagated fully.
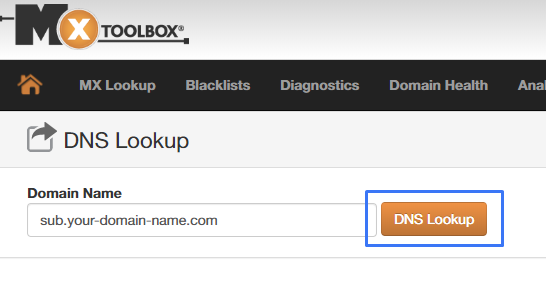
- Open a new browser tab and go to https://mxtoolbox.com/DNSLookup.aspx

- Add your new domain name into the Domain Name field -- make sure you add your subdomain.
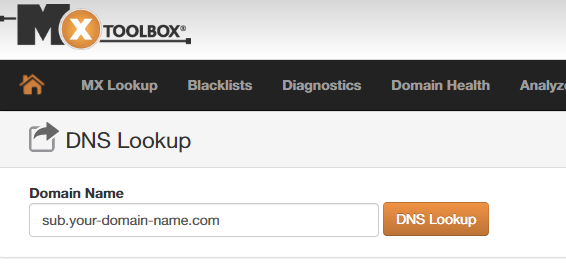
- Click DNS Lookup.
Not found/Not ready
When the domain is not found or ready for addition to your control panel, you will see the below information.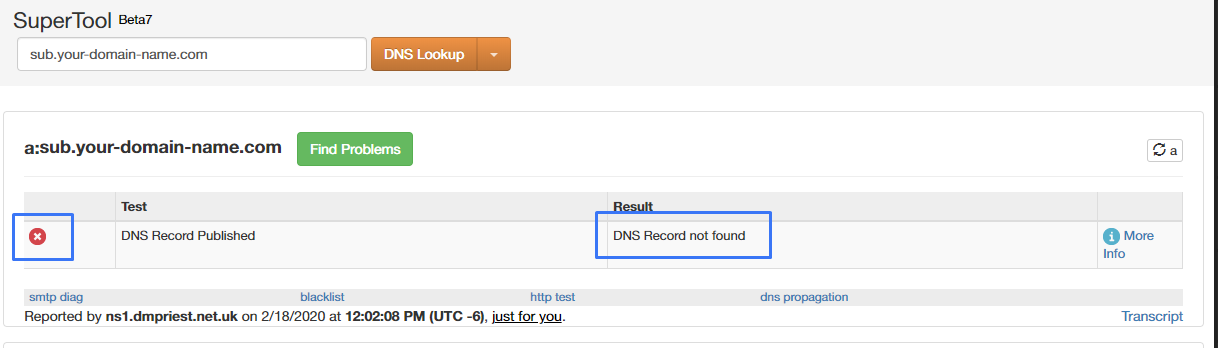
Success/Ready
When your domain is found and ready for addition to your control panel, you will see the below information.
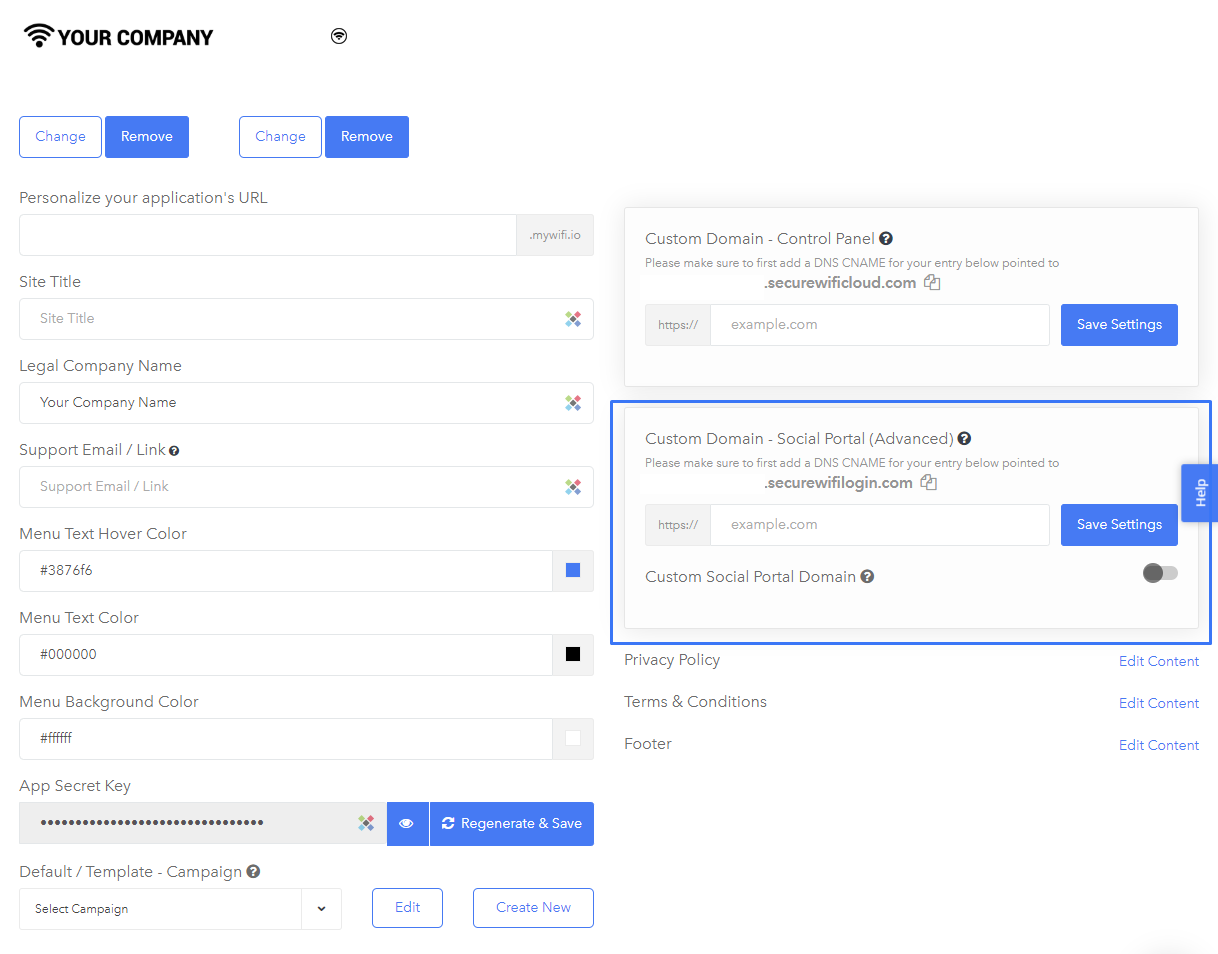
Branding overview
Now that you have confirmed that your new domain is active, you can begin adding it to your dashboard and changing the social portal URL seen by guests.
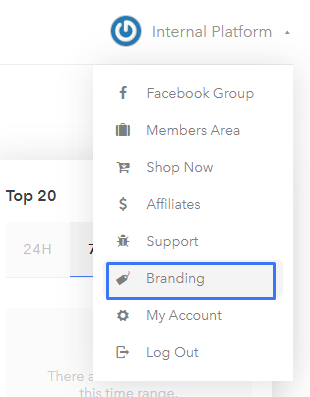
- Log in to your MyWiFi dashboard.

- Click the Account menu.
- Select Branding.
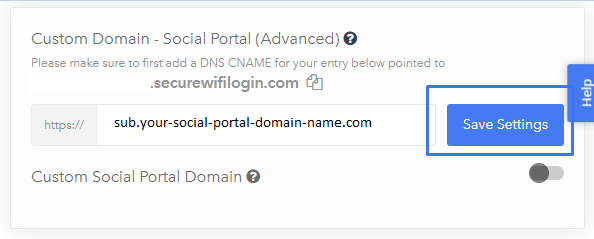
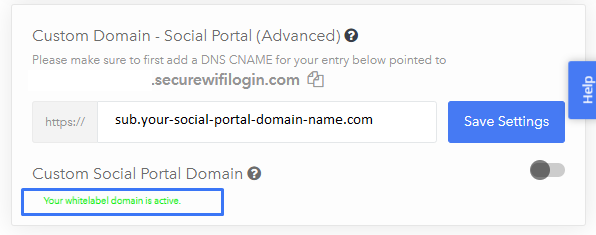
- Go to the Custom Domain - Social Portal options.
- Enter your subdomain.
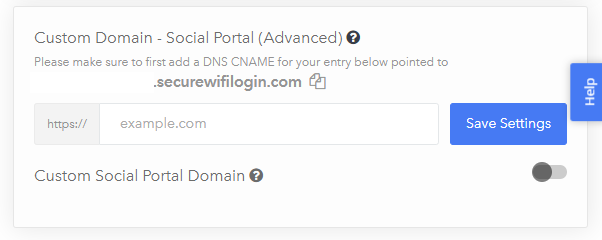
- Click Save Settings.
SSL Approval - Required
Once you have set up your social portal URL, our system will need to check and confirm the URL is working, then create an SSL certificate to ensure that the communication is secure. This process usually takes 1-2 hours. Be sure to check back and continue below. - Your Custom Branded MyWiFi portal URL is ready.
If not found, double-check that it can be found with DNS lookup and that it's configured properly at your registrar.
- Log in to your campaign and confirm the new URL is working.
Social apps
To keep everything completely on-brand, you will have to either create new social apps or edit your old ones. This is due to the way that social apps integrate with MyWiFi; they use your domain to make sure everything is set up correctly.
You can find the instructions for each login app in our Supported Apps article.
Testing your new login portal
After creating your new social apps, you can preview and test the new settings in your dashboard by clicking on the preview button on your campaign page; this will open your campaign in a new tab.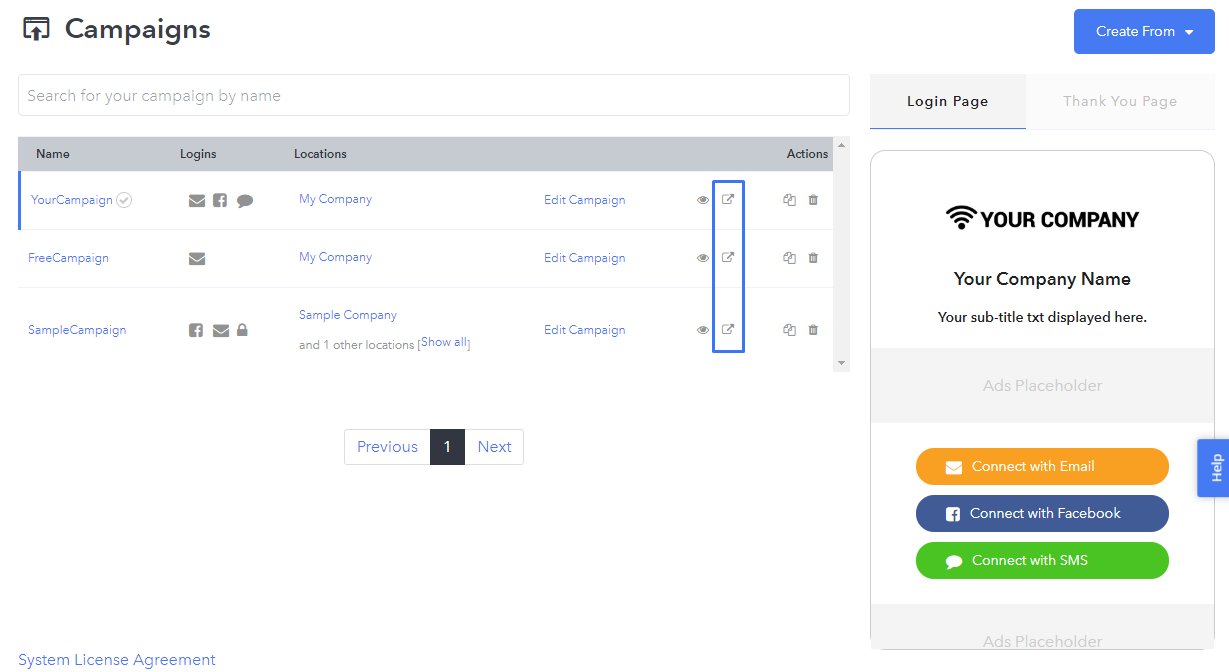
Log in to test your new social apps: if the preview loads your custom portal URL starting with https:// then you're all good - proceed to the next step. If you encounter any errors, check back and ensure that you completed Step 1-4 properly.
Go live - enable your custom social portal URL
Before going live make sure you've completed the following:
- Ensure that all your devices have updated firmware.
- Ensure that you have updated your social apps.
- Ensure that you have associated your new/updated social apps to your existing campaigns.
- Ensure that you have tested the login process.
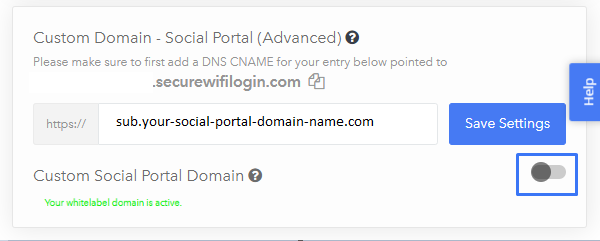
Once you are ready, you can enable your custom social portal URL across all your devices by turning the switch to ON in your branding section.
Need Help?
If you have any questions, please contact our support team by clicking the support icon located in the bottom right-hand corner of this page.
Comments
Please sign in to leave a comment.